Industry 4.0 – surface inspection of steel uncovered
Anastasia Paramore and Roeman Kirmse FIMMM discuss the actuality of Industry 4.0 when it comes to surface inspection at Tata Steel Europe.

Tata Steel Europe surface and process specialists have collaborated to create an object-oriented program, combining expert human input with a coil digital twin and a rework optimiser algorithm to create a rework path for each coil with surface quality issues. Getting there has been a long, but essential, process to meet the increasing surface quality expectations of customers.
During the second industrial revolution – Industry 2.0 – the UK began electrification and the first steelworks were built in Port Talbot. Several steel mills were established across South Wales, but most closed within 50 years of opening. The late 1940s saw the merging and nationalisation of the steelworks across Wales as the Steel Company of Wales, becoming part of the British Steel Corporation shortly after.
The rise of Industry 3.0, after World War II, saw the closing of old sites and development of new ones which are still in use today. The steelworks at Port Talbot, Trostre and Llanwern have been making and rolling steel for around 60 years. Industry 3.0 saw automation with IT and electronic implementation to carry out some human tasks. During the late 1980s and early 1990s, the continuous annealing and advanced coating lines were built, with a view to succeed in the automotive steels market. Each line followed a similar blueprint, with lessons learnt from one installation applied to the next.
The surface inspection department’s journey can be likened to the move from paper maps, to satellite navigation systems, to self-driving cars. Over 20 years ago, features of concern were hand drawn on a grid. These bits of paper followed the coils through the different production areas and the company relied on individuals to make decisions about what the feature was, whether acceptable and how to fix it. This method was slow, as it took a long time to track down features to enable decision-making.
In the early 1990s, the first feature logging systems were installed across sites. These logged data such as width, length and weight. Inspectors could log features by viewing the moving strip and when a defect was spotted, for example a hole, they pushed a button on a dashboard and the feature name and location in metres was stored.
By the end of the 1990s, the first automatic inspection systems were introduced and presented images with classifier labels on computer screens. Retro-fitting inspection systems onto the lines was an engineering challenge in itself – the optimal place to capture the images was sometimes limited by space. This meant these systems were not used to their full potential and became more like CCTV. As the problem of classifying features on steel substrate became evident, this led to significant developments by manufacturers in both lighting and camera technology.
The development and strategy of each individual installation organically grew around the skillsets and understanding of each works area. This resulted in almost a cottage industry, where the same problems were corrected in different ways. Recognising this, a central inspection system team was created with the mandate of following uniform guidelines. This way, best practices were documented and adopted throughout the site.
Reality check
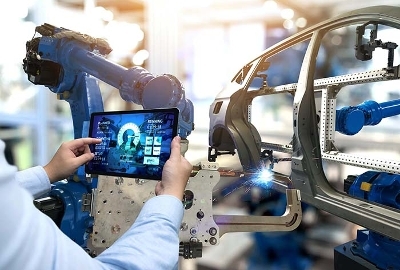
With the development of the internet in the 1990s, the use of personal computers and electronics soared and with it the development of technology increased exponentially. This brought cameras of once unimaginable resolutions, fibre internet connection over 100 times faster than the phone lines of the 90s and expert systems using machine learning and creating significantly large amounts of data.
The term artificial intelligence (AI) has become synonymous with Industry 4.0. It gets the non-science world very excited, but AI is just some complicated programming. Researchers have been investigating AI for the best part of 100 years and there have been many successes along the way, but strong AI is yet to be achieved. Applied AI (aka weak AI) has been developed, namely the application of human expert knowledge to machine learning, within very specific tasks and boundaries.
That is not to say that things cannot go wrong – there are many examples on the internet of ways AI outsmarts its creator, resulting from machines learning algorithms without appropriate boundaries. People will naturally follow unwritten rules of common sense and morality, but computers do not – unless they are programmed in. Any system which is designed to make a decision needs extensive virtual and physical testing and strict fail-safes in place to manage its logical processes. Whose responsibility is this and how to manage this is a much-needed ethical debate.
The transformation from Industry 3.0 to Industry 4.0 is this idea of automated becoming autonomous. Now, this does not mean that we exclude human interaction and intervention entirely. We will always need specialists to input into expert systems and engineers to design, create and fix hardware, software, and mechanical fail-safes. We need people to react to the extraordinary, anomalous occurrences that are outside the defined task boundaries in which our systems are equipped to operate autonomously and safely.
Boston Consulting Group presents the term ‘the bionic company’ as a representation on the fourth industrial revolution – the idea being that manufacturers make decisions based on both human and AI input. This is where the reality lies for most companies looking to embrace Industry 4.0.
Industry 3.0 has left companies with masses of data and no clear way to use it to its full effect. One area of value in Industry 4.0 comes when pairing manufacturing execution systems with digital twins and optimisation routines for increasing efficiency and all of the associated benefits – lower resource usage and spending, increased yield, increased productivity, extended machinery life, to name a few. Creating predictive maintenance systems, instead of routine maintenance, optimises time and resources. Gaining a real understanding of the data that a company produces, determining what is useful and what can be achieved with it, is of key importance.
Old industry, new tricks
Due to the desire to meet customers’ expectations for both the quality of sheet surface and dimensional accuracy, significant investments were made in both data logging solutions and surface inspection systems so that all relevant data could be captured. However, this became a double-edge sword, because as the capture rates increased, the ability to humanly identify abnormalities became much more difficult. As an example, one manufactured coil making one pass through a production unit could generate over one billion data points in a two-minute production period.
Is this Big Data? The team thought not, and planned to continue to expand data acquisition to enable better decisions for customers. This, however, led to one important and major problem – how to store and process this volume of data in a timely fashion?
The beginning of the journey from Industry 3.0 to Industry 4.0 started around 2009, with a new inspection system on Trostre’s pickle line. This system was state-of-the-art, it was one of the first systems to use parallel computing efficiently, as such, nobody wanted to break it so the system wasn’t used to its full potential. After some time, the team realised that it wasn’t doing what was wanted for the business, and so they began trying to create custom tools to analyse the inspection system data post-production. This attempt led to an initial analysis system about eight years ago.
The system read the coil data and processed it through a logic engine that allowed for any rules to be applied without making changes to the main assembly. This meant complex and detailed quality rules could be written using early clustering methods to group surface features together, making a more accurate result possible. The team were unknowingly creating digital twins of the strip surfaces, but still had a lot to learn.
Version one of this program worked, but it had limitations around the ability to store the output data from the logic engine in a timely manner. As data moved through the logic engine, it could sometimes be changed by the rule logic to improve the accuracy. This meant conventional storage methods were unusable. There were also issues with the inability to run the large code packets that were required to describe complex surface features and the significant time it took to write to databases. However, when version one of the program was implemented in 2011 on the Trostre site, it halved the number of surface complaints, so the team must have been doing something right.
Rip it up and start again
To resolve the issues, the team took a system that worked and threw it away, figuratively speaking. Work on version two began almost immediately and it was implemented around 2013. The new system implemented a run-time compiled, object-orientated model that allowed the user access to a full strongly-typed language at the heart of the logic engine. Compared to version one, the new system was no longer hindered by slow database speeds nor limitations on the number of characters of code that could be written for one rule.
This meant very complex rules – over 2,000 lines of code – could be written and third-party components could be used by the logic engine, making interaction easier. This system was the proof-of-concept that this unprecedented volume of data could be handled at near run-time speeds. Now the real work would begin.
The system was capable, but it had to be useful for the inspectors. Understanding of the data was needed across the site in terms of what is represented, where it comes from, how it is produced, what format it is and how to access it. With this understanding, the team worked with the inspectors to determine what was useful and what was not. The right data had to be presented at the right time, in the correct way, such that the inspectors were empowered to make efficient, informed decisions.
By 2018, a feed-forward system from the hot mill to Trostre pickling line had been established. This feed-forward of the coil’s digital twins allowed the site to optimise its pickle line operations. The engineers processed the hot mill coil data against their own customer and operational requirements to optimally match coils to orders and operation paths. As a second proof-of-concept, feed-forward data could now be used to control production lines.
Further work between surface and process specialists led to the creation of an object-oriented program that combined expert human input with a coil digital twin and a rework optimiser algorithm. This creates an optimised rework path for each coil with surface quality issues between the galvanising and coil inspection lines. This program is capable of reading feature location data and then stopping the production line to within one metre of a feature, so that the attribute is on the inspection bed. This means an inspector can confirm the type and severity, and approve or adapt the rework path suggested for each coil by the program.
While the program currently only communicates and optimises between two production lines, the adaptable way in which it is written opens the doors to feeding data forward from even further back in the production process. The eventual plan is to carry out this real-time, feed-forward and rework optimisation from casting to dispatch.


